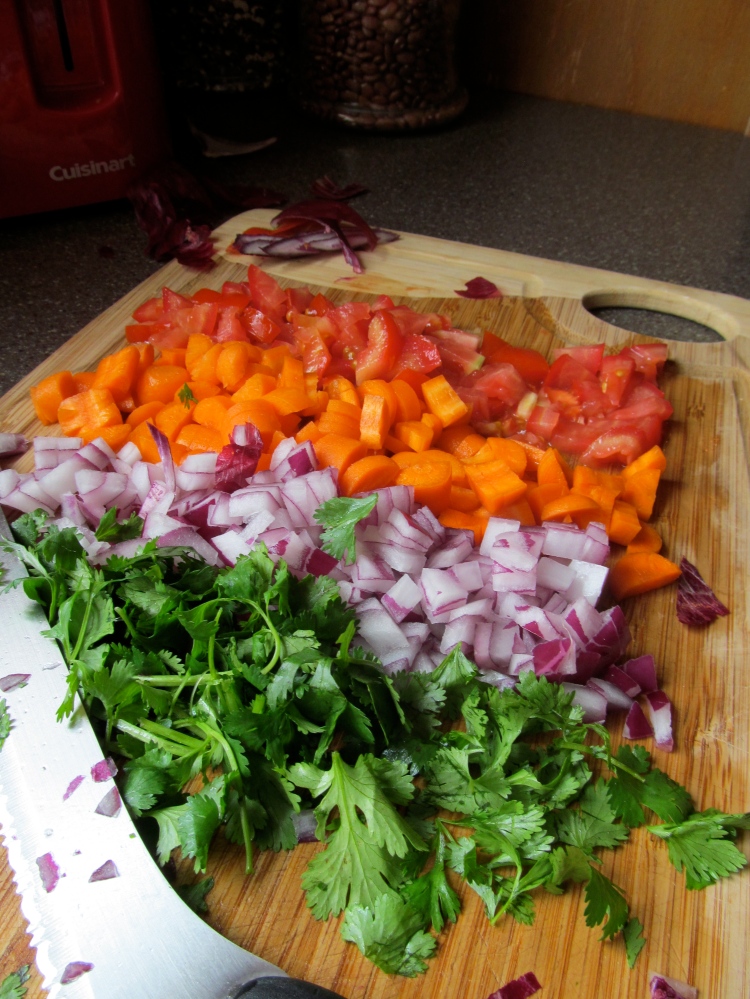
Spicy Black Bean Dip

Awhile back, I got a molcajete from Little Village in Chicago. It’s basically a beautifully crafted Mexican mortar and pestle made from volcanic rock. After hours of seasoning it, I’ve made salsas and guacamole and they have been splendid! Spicy, smokey, sweet.. whatever I’m in the mood for – this will be the summer of salsas, dips, and chutneys!

Image

This afternoon, I decided to try something new and whip up some black beans with green chiles to make a delicious “hummus” of sorts. As I was making it, I kept throwing in more things. So feel free to taste and reconfigure as you go through it! Plus, this is a fairly small amount – feel free to double the recipe!

Image

Spicy Black Bean Dip

1 12 oz. can of Black Beans, drained and rinsed
2-3 cloves of Garlic
2-3 Green Chiles, dependent on spicy-tolerance
1-2 T. Cumin Seeds
1-2 T. Dried Oregano
2 T. Hot Sauce (I used Tapatio)
1 Avocado, diced
1 Lemon or Lime (I used lemon, but prefer lime)
Salt to taste
Delicious crackers, tortilla chips, or toasts!

Image

In a mortar, smash up the cumin seeds, oregano, and salt so that it becomes a fine grain. Next, crush in the garlic cloves and green chiles to make a paste-like mixture.

Image

In batches, mix in and crush the black beans, you can either leave some beans whole or make the entire dip smooth. As you’re mixing, squeeze in some fresh lemon juice or lime juice.

IMG_5517

Image

Now, it’s a matter of changing up the flavor profile to your liking. I poured out the mixture from the molcajete and started folding in new ingredients.

I mixed in some avocado, added additional salt to my liking, and a couple dashes of hot sauce. Other ideas for add-ins could be some cilantro, fresh diced tomatoes, or even cheese!

Image

Serve with crackers, tortilla chips, or toast. It’s bursting with flavor, spicy, and rich! Give it a shot. This will be a delicious treat on a sunny hot day!

Love,
Mimi

Ps. WOW. Just put it on some toasted baguette. YUM! LOOK AT THIS.
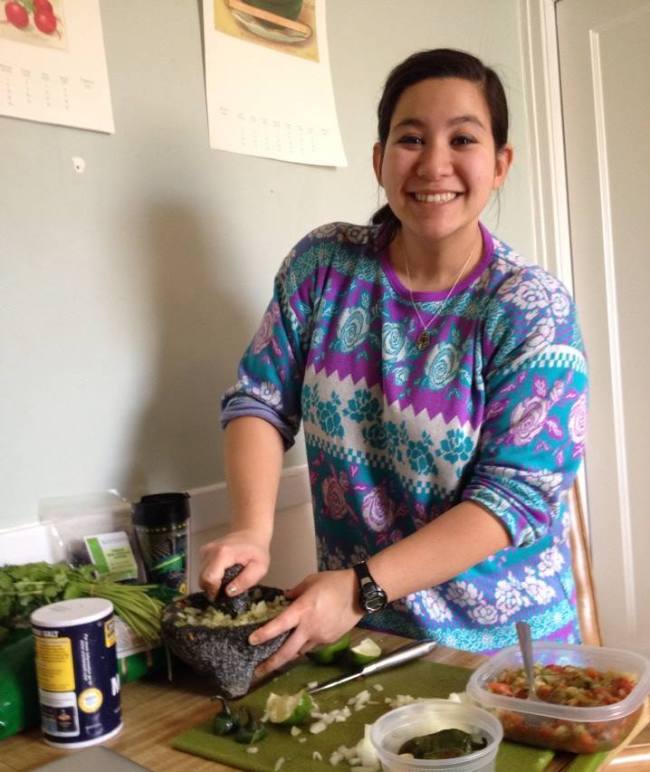
photo (30)

Spring Vegetables with Bulgar

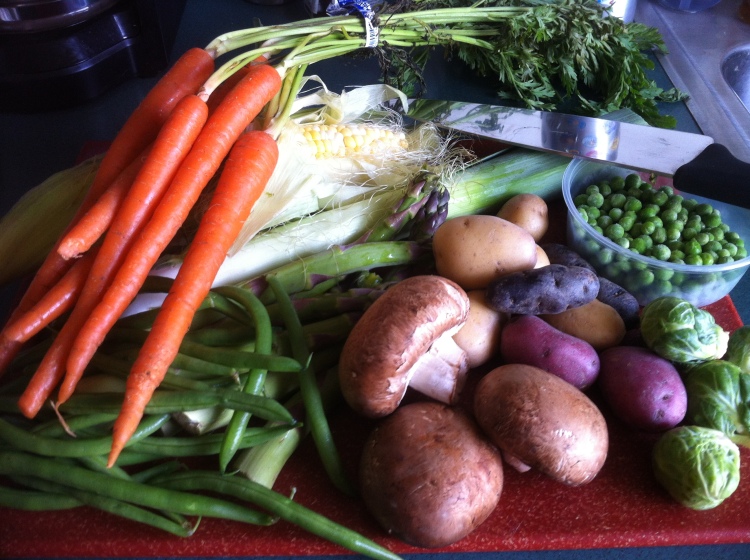
So I officially graduate with my Master’s in Social Service Administration in a short 12 days. Tomorrow, we are having a potluck with our group to celebrate the year’s end! I knew I wanted to make something vegetarian, seasonal, and hearty. So I went to the store, grabbed all the “spring” I could find in the produce section (sadly, the peas are frozen) and went to work. IMG_5236 I didn’t make much, so feel free to be more generous with your ingredients. Here’s what I came up with: IMG_5248 Spring Vegetables with Bulgar 1 cob of Corn 1 Leek, trimmed and sliced 1-2 T. Garlic, minced 3 spears of Asparagus, sliced 4 small Carrots, diced 5-6 Marble Potatoes (mixed), diced 1/2 c. Peas 1/2 c. Green Beans, sliced 1/2 c. Brown Mushrooms, minced 1/4 c. Bulgar Wheat 3/4 c. Water Olive oil Thyme, Rosemary, Salt, Pepper (Expert tip!: Take your peelings, stems, cobs and place them in a gallon size bag in the freezer. As you cook with more fresh produce, collect these trimmings. Once the bag is full, heat up with some water, herbs, and make your own fresh veggie stock!) In a deep pot, heat some olive oil on high. Once the oil is hot, sauté the garlic and leeks until the leeks are tender. Next, throw in your carrots and potatoes and stir occasionally. Stir in fresh thyme and rosemary stems or dried herbs. As they carrots and potatoes start to brown, mix in the green beans, mushrooms, and asparagus. Season with salt and pepper. IMG_5240 As the mushrooms begin to release liquid, turn the heat down to medium. Continuing stirring occasionally and add in your peas and corn. Remove the herb stems. IMG_5241 Once the corn starts to gain some rich yellow coloring, stir in your bulgar and water. Turn on high. As the water begins to boil, turn the heat down to simmer and cover. The bulgar takes about 8 – 10 minutes to cook. Give it a few final whips with the wooden spoon and serve hot! Or place into a casserole dish to re-heat! It can be served as a side dish or an entree! IMG_5245

Enjoy!

Love, Mimi

Celery & Kale Soup with Croutons

What to do with a bunch of celery stalks sitting in your fridge just waiting to be used.. Looking for a quick appetizer or a light lunch? This soup is absolutely refreshing and a perfect welcome to Spring time.. or at least an encouraging nod towards sunshine!

Image

Celery and Kale Soup

1-2 T. Olive oil
6 stalks of Celery, big chunks sliced
1 c. loosely packed Kale leaves, chopped
1 T. Garlic, minced
1 T. Green onion, sliced
1 can Coconut Milk
3/4 c. Water (or try broth!)
3 T. or a generous pour of Red Wine Vinegar
2 T. and 2 T. Dijon Mustard
1 T. Herbes de Provence Additional Thyme & Rosemary, if needed Salt and Pepper to taste

Croutons
1/2 Day Old Baguette, diced
2-3 T. Olive oil
Parmesan, grated (optional)

To make the croutons: Preheat oven to 325 degrees. On a medium sized cookie sheet, lined with either a silpat or aluminum foil, place the bread pieces in one layer. Bake the bread for about 10 minutes. Once the bread has dried out and lightly browned, pour on the 2-3 T. of olive oil evenly across the croutons. Continue to bake until each piece is perfectly golden brown! Once the croutons are ready, if you’d like, evenly grate some fresh parmesan cheese on top!

Image

For the soup: In a medium soup pot on medium heat, heat the olive oil and sauté the garlic, celery and kale for about 4-5 minutes with a pinch or two of salt, herbes de provence, black pepper, and the first 2 T. of dijon mustard. Then add the water/broth, increase the heat to high and cover.

Once the liquid is boiling, bring heat down to let it simmer. Once the celery and kale are tender, pour in the coconut milk and green onion. Stir it up!

Turn off the heat, either using an immersion blender or a regular blender, blend up the soup to your preferred consistency. I like it extra smooth. Once the soup is to your liking, throw in some more dijon mustard. Give a pour of your red wine vinegar (I “guess-timated” about 3 T.). Finally, season the soup to your liking! I decided to add some more rosemary and thyme to the soup, but feel free to play around with flavors!

Image

Serve hot with some parmesan croutons on top! This soup was refreshing, bright, and had a great zest. The crispy croutons were a perfect compliment to the lightness of the soup. The flavors were perfect for lovely Spring day!

Now if only Chicago could get it’s act together and bring on Spring! Here’s to hoping for warmer weather soon!

Love,

Mimi

Deconstructed Elote Casserole

Elote is a Mexican street food that consists of grilled corn, mayonnaise, spices, & cheese. It’s super messy, it’s delightfully cheesy, and full on delicious.

SimpleFoodie, Wikipedia Photo

And it also happens to be one of my guilty pleasures – actually, I am not that guilty about it. Not at all.

For the Super Bowl, I decided to try out making elote in casserole form with all the ingredients still in it, plus some garlic, green chiles and red onion for some extra flare! I can’t take all the credit though, props to Food & Wine + The Food In My Beard for popping up on my google search and proving to me that this idea wasn’t all that crazy.

It works well as a side dish, a dip for chips, or a great addition to a taco!

IMG_3672

Deconstructed Elote Casserole

2 cans of Whole Kernel Corn or 2-3 Husks of Corn
1 medium Red Onion, thinly sliced
3 cloves Garlic
3 Green Chiles
1 c. Mayonnaise
1 1/2 c. Cotija cheese, 1/4 c. Cotija cheese for topping
3 Green Onions, sliced
3/4 c. Cilantro, minced
1-2 Limes, for juice and zest (save some juice for garnish)
1 T. Oregano
2 T. Cayenne Pepper
2 T. Chili Powder
3 T. Paprika
Salt (optional, to taste – the cheese is pretty salty already!)

Preheat your oven to 400 degrees.

In a medium size mixing bowl, mix together the green onion, cilantro, mayonnaise, cheese, and spices. Feel free to take culinary liberties in the different amounts of spice used. If you prefer spicier, add more cayenne. If you like it a little smokier, throw on some more paprika. Make sure to taste as you go along! Next add some lime juice from 1 lime and about 1-2 tsp. of lime zest.

IMG_3657

If you prefer spicier, add more cayenne. If you like it a little smokier, throw on some more paprika. Make sure to taste as you go along! Next add some lime juice from 1 lime and about 1-2 tsp. of lime zest.

IMG_3658

In a medium-large size oven-safe pot, spray or brush with oil and put on high heat. Grill the corn until it starts to char or brown, then throw in the red onion, garlic, and chiles. As the onions start to release moisture, turn the heat down and let it simmer until majority of the moisture is evaporated.

IMG_3666

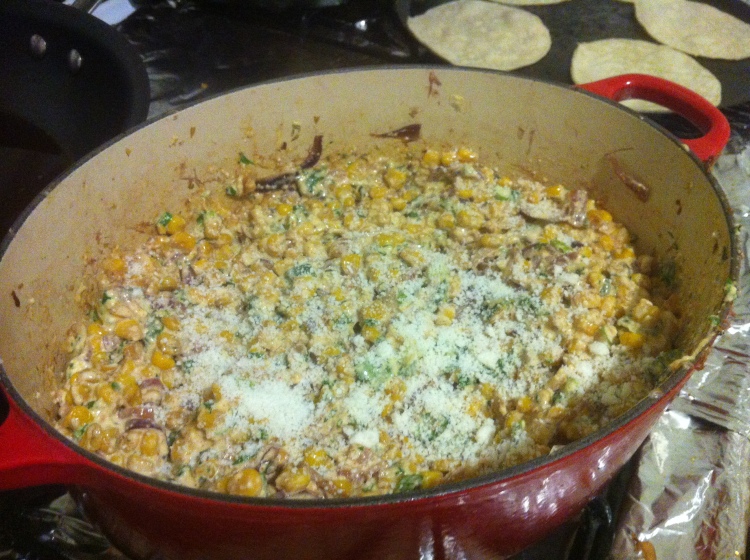
Turn off the stove and pour in the mayonnaise mixture with the corn. Whip it up so that all of the ingredients are evenly distributed.

IMG_3670

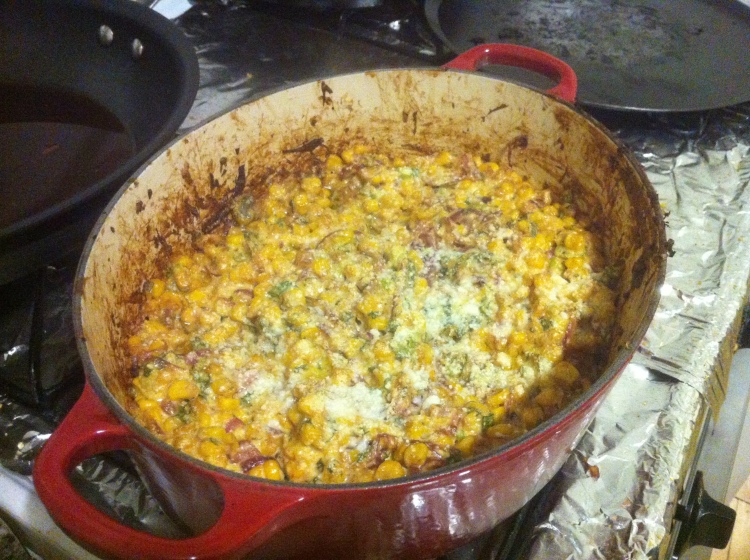
Add a little more cheese on top and pop it in the oven for approximately 45 minutes or until the whole mixture starts to bubble!

IMG_3672

Serve hot with some warm tortillas or chips. Don’t forget the lime wedges!

This was a big hit with everyone! I admit that I put a lot more cayenne than this recipe says since I like it pretty spicy. It had an amazing kick and paired really well with the caramelized red onion. The only thing that I wish was that the corn grilled a bit better. This would be awesome to make in little ramekins as well! Try it out!

Keep warm out there!

Love,
Mimi

Triple-A Couscous Salad with Sun-dried Tomatoes

Asparagus, Arugula, and Artichokes comprise the Triple A’s in this delicious couscous dish! I threw this together tonight and it is one of the most tasty meals! I made it extra winey because that’s how I like it, but feel free to tinker around with those measurements!

Screen Shot 2013-05-20 at 11.13.27 PM

Triple-A Couscous Salad with Sun-dried Tomatoes

2-3 T. Oil
1/4 – 1/2 c. Artichoke hearts, sliced in small chunks and big chunks
6-7 stalks of Asparagus, sliced
2 c. loosely packed Arugula
1 1/3 c. dried Israeli Couscous, make as directed on box
1/4 c. Sun-dried Tomatoes, chopped
1/2 White Onion, diced
1/4 c. Grated Parmesan (optional)
2-3 T. Parsley
1/2 – 1 c. Dry White Wine
Salt and Pepper to taste

Roast your asparagus whole with about 1/2 T. of Oil, salt and pepper to taste at 400 degrees for about 10-15 minutes or until tender. Once cooked, slice up into 1-2″ pieces! Cook your couscous!

Once the couscous is all cooked, keep it in the saucepan and set the stove to a low/simmer heat. Mix in your onions and sun-dried tomatoes. Cover the couscous for about 3-4 minutes so it gets all steamed up!

Screen Shot 2013-05-20 at 11.11.06 PMThen turn off the stove. Pour in the wine then fold in your artichokes and sliced asparagus.

Screen Shot 2013-05-20 at 11.12.37 PMMake sure to vary your artichoke heart sizes so that you get some real tasty bites!

Screen Shot 2013-05-20 at 11.12.55 PMThrow everything into a mixing bowl with the remaining olive oil and you could add here some type of wine or cider vinegar if you have! Lastly, fold in the arugula and you’re all done!

Serve hot, room temperature, or even cold! Enjoy! Screen Shot 2013-05-20 at 11.13.27 PM

This dish is perfect as a side, starter salad, or a delicious summer lunch!

Love,

Mimi

Roasted Beet and Carrot Quinoa Salad

I have a very deep and true love for beets. They are my absolute favorite root vegetable. I love their rich ruby red coloring and their earthy taste. They are a fantastic addition to all sorts of meals!

IMG_9075

Today, I decided to make a roasted beet and carrot salad mixed in with quinoa, the most protein packed grain! Super rich and filling, this is a wonderful meal or side dish to share with your vegan friends!

IMG_9077

Roasted Beet and Carrot Salad with Quinoa

1 large Beet
4 medium sized Carrots
1/2 Yellow Onion, thinly sliced
2 cloves of Garlic, unpeeled
1 c. Quinoa (uncooked)
Olive oil
Salt and Pepper to taste
2 -3 sprigs of fresh Thyme
fresh Parsley for garnish

Dressing

2 T. Apple Cider Vinegar
1 T. Olive oil
1 tsp. Dijon Mustard
Salt and Pepper to taste

Preheat the oven to 400°F. Peel and slice the carrots and beets into 2″ uniform pieces. In a medium sized baking dish, throw in the rooty vegetables and drizzle with olive oil. Toss in the fresh thyme, the whole garlic cloves, salt and pepper. Let them roast for approx. 30 minutes – tossing occasionally.


IMG_9076In a small saucepan, caramelize the thinly sliced onions with some olive oil. Cook your quinoa to the specifications on the label. I used 1 1/2 c. of water for my 1 c. of quinoa.

Once the beets and carrots are tender, take them out and pull out your garlic cloves. Release them from their skin and mash up the garlic. Mix together the cooked quinoa, caramelized onions, mashed garlic and roasted roots.

Whisk together the dressing ingredients and pour on top! I threw on some fresh parsley as garnish. Enjoy!

IMG_9078

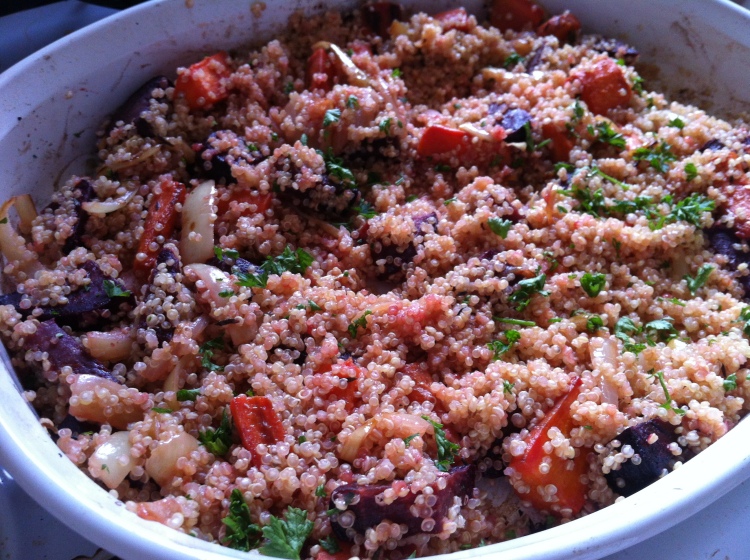
This is a delicious and colorful salad! The beets have an earthy taste that blends well with the sweetness of the carrots. Plus, this apple cider vinaigrette is one of my absolute favorites!

Love,

Mimi

Utter NAANsense with Mint Chutney

Alright, shameless pun, but here’s what Rachel and I were up to tonight. This is the easiest dough of all time. It’s fun to do in groups, there’s hardly any rising, and it goes with everything.

Naan

1 c. whole wheat flour
3/4 c. greek yogurt
1/2 t. baking powder
1/2 t. salt
1/4 t/ powdered garlic

Chutney (blend all ingredients together)

1 c. mint leaves
1 large sprig cilantro
1/2 t. chili powder
1/8-1/4 c. water
1/2 onion
2 T. lemon juice
1/2 t. salt

1. Mix dry ingredients together, then add yogurt until a dough forms.

2. Place rounded dough into a bowl covered in plastic wrap and let sit 30 minutes ish.

3. Cut dough into six parts.

Image

Roll the dough out into tortilla-thin slices.

Image

5. Heat oil on medium-high heat and grill.

Image

Enjoy!

Fran

Ps. To try something new, cut the powdered garlic. Instead sautée some garlic and onions in a pan and roll into the dough before refrigerating! Or try some other add-ins as well! – Mimi

Lemon Herb Vegetable Hash

On a lazy Saturday morning after a very fun night out with my cousin and her boyfriend, I opened up my fridge and all I had was a drawer full of produce, some wheat bread, and some eggs.

After pouring myself a tall glass of water, I decided it was time for a good ole vegetable hash. This is the perfect way to clear out some vegetables from your fridge and make a real hearty brunch using 1 skillet and fairly minimal effort!

I used a variety of different vegetables, but feel free to pick out whatever’s lying around in your fridge:

Lemon Herb Vegetable Hash

Olive oil
1 T. Red Onion
Zucchini
Yellow Squash
Butternut Squash
Mushrooms
Tomatoes
Eggplant
Red Potatoes
Lemon Juice
Various herbs (I used basil and rosemary), Salt & Pepper to taste

This recipe is fairly straight forward so I am not going to give a very in-depth step-by-step. I rough chopped all of my vegetables – mostly diced.

In a large skillet over medium-high heat, I added some olive oil and then the red onion. I slowly added all of the various vegetables and made sure they were coated in the olive oil. I let them cook through while tossing them occasionally. You want to make sure to put them in order based on how fast each of them cook.

I started with the butternut squash and potatoes. Then added the others — saving the tomato for last. You may need to add some olive oil, but you don’t want to add too much – then you have greasy soggy veggies. Bring the heat down so as not to burn your vegetables. As the vegetables start to cook and some brown, deglaze the pan with the lemon juice and spread the herbs over the vegetables.

photo

Then I fried an egg to place on top or you could add a poached egg if you have the skills. Or you can omit the egg all together and this could make for a great side dish paired with a different protein!

This dish goes perfectly with a slice or two of some crusty seedy whole wheat toast!

This vegetable hash had such a beautiful aroma and tasted great! There were all different kinds of textures and the lemon juice brought it all together.

Love,

Mimi

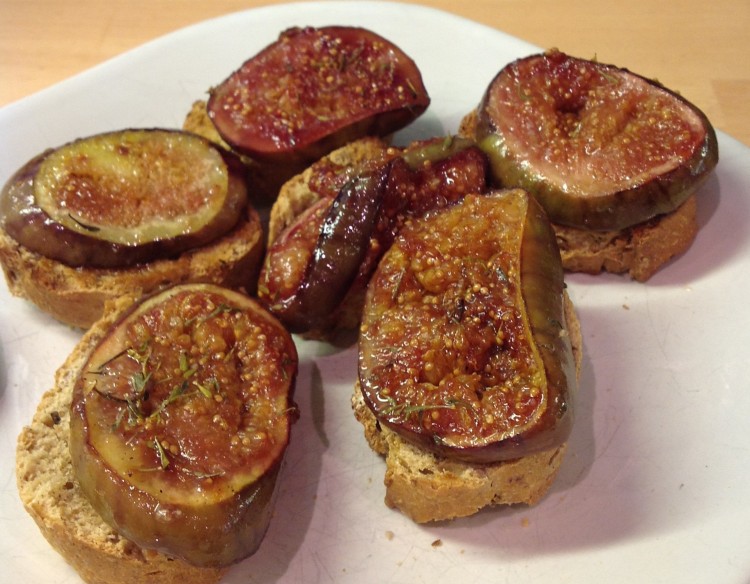
Braised Figs with Honey & Thyme

Alright, this one is pretty self explanatory.

IMG_0100

I was walking down Edgeware Road (IN LONDOOOON) and I came across a fruit stand with a guy selling figs, 4 for £1, and I definitely took advantage. I guess it’s fig season? Anywho, I’m going back tomorrow because these puppies were TO DIE FOR. For this hors d’oeuvre, you will need:

figs
Image
olive oil
balsamic vinaigrette
salt & pepper
thyme
honey
goat cheese
toasted baguettes slices

To start, heat up olive oil on medium heat so it evenly coats a frying pan, but you don’t want to fry these guys or nothin’.

After washing them, slice the figs hamburger patty style (skins too!) and get ’em ready for grillin’, excluding the butt and the pointy end.

Once the pan is hot, place the figs onto the skillet and add the desired amount of salt and the optional pepper. It all depends on how sweet or savory you want them. If you want them more savory, consider cayenne pepper or garlic salt, which both go surprisingly well with honey.

When the figs have started to brown, toss balsamic vinaigrette into the skillet and flip all your fig patties. You want to watch them carefully, and heat them higher rather than lower, because they fall apart really easily.

Sprinkle honey & thyme.

IMG_0099

Enjoy these on a crispy baguette with some goat cheese to balance it out! drizzle oil or honey to season! And don’t get to impatient that you burn the whole roof of your mouth like I did. Make your flatmates try them too, if even if they’re judgey about your weird food.

Love,
Fran

The Hoppin’ Johnny

I’m breaking from my foodblogging hiatus to share with you the magic of this killer peasant dish. So both years I’ve gone to the Pitchfork Music Festival, I ate this thing every day from the Wishbone stand. It’s so simple, so fresh, and so hearty that I wrote everything down and simply had to make it for myself.

AND it has a good history. The Hopping John is a West African dish popularized in Southern U.S. that many of people eat now on New Years to bring good luck and prosperity. Some said counting the number of peas in a serving predicts the amount of wealth that they will have in the coming year. In a recovered journal from the 19th century,  Frederick Law Olmsted referred to the greatest luxury as an assemblage of peas, bacon, and peppers, referring to this dish. Granted, mine has no bacon because I am a veggie, please enjoy this yummerific filler. Also called Hoppin’ Juan, Skippin’ Jenny, or if you’re a drunk Pitchforker (me), the “Rocking Ronny.”

IMG_0433

1 16 oz. can black eyed peas
1 c. brown or wild rice
1 c. unsalted peanuts
1 large tomato
1 large red pepper
1 c. carrots
1/2 large red onion
1/2 c. cilantro
red wine vinegar
balsamic vinegar
lemon juice
pepper

Firstly, start to cook your brown rice. If you want it to be more like an entree, do more than 1 c. rice, but this was the perfect proportion to everything else in the toss-up.

Once that’s on the stove, drain the beans and rinse them in a colander. Get all that goop off of them, if they were anything like the shitty Kroger brand that I had. On medium heat, toss the beans onto a large frying pan until they’ve dried out. When they’ve lost some of their moisture, throw on the peanuts and toss occasionally while you chop veggies.

IMG_0428

Dice everything else—peppers, carrots, onions, tomatoes, cilantro (rough chop)—and leave it be.

IMG_0430

Once the peanuts and beans have roasted a lil’ (they’ll both soften slightly), throw them into a casserole dish, or whatever you want to store it in. Douse them in balsamic so everything is a little coated. When the rice is done, stir that into the beans n’ nuts, then add the veggies!

Finally, throw the red wine vinegar and lemon juice on the salad. I wish I had measured, but I’m willing to guess between 2-3 T of each. Season with pepper to taste. Enjoy with pita, or better yet, a hoppy beer.

IMG_0432

Happy Summer!

Francisco